


It’s an exciting time to start making gummy candy! As a rapidly-growing industry, there are amazing new opportunities — but there are also plenty of tried-and-true techniques already emerging.
Whether you’re making gummy bears homebrew in your garage or aiming to be a bonafide gummy tycoon, ensuring good fundamentals is key. While there’s no universally agreed upon gummy making kit, these are our recommended guidelines for our clients that we’ve seen work time and time again.
RECIPE
The first step in learning how to make gummies is developing your recipe.
The recipe determines not only the taste, texture, and mouthfeel of your gummy, but also its production efficiency and shelf stability. The recipe dictates the ease of pouring the slurry, demolding the cured gummies, and packaging the final product.
Will your gummy be gelatin or pectin-based? Gelatin is sourced from pork or beef (so, non-vegan) and is sensitive to high temperatures — if you leave gelatin gummies in your backseat on a hot day, well …yeah, not recommended.
On the other hand, pectin is not only vegan, but is also less temperature sensitive. However, producing pectin gummies is notoriously tricky. Because of this hydrocolloid’s quicker cooling rate and pH sensitivity, the setting and curing process requires more care.
Be sure to check out our Gold Standard Recipes & SOP’s for more information on the differences between pectin and gelatin.
INGREDIENTS
Recipe locked down? Next step is sourcing ingredients.
You’ll want quality ingredients for professional, not personal, use. Grocery store gelatin might work for a 50 piece batch, but will it hold up for 1,000+ gummies? Small variations can make or break your whole operation. When it comes to making gummy candy at scale: sweat the details.
When sourcing pectin, for instance, consider the following questions: What’s the bloom strength? Are there sodium citrate or carbohydrate additives included? Is it “pre-buffered?” Is it a high methoxy, slow-set pectin? How about your gelatin; do you know the mesh size? What’s your humectant’s D.E. rating? Is your flavor add oil or water soluble? These details are often obscured with standard grocery store fare, so make sure you’re buying from trusted sources of gummy ingredients.
R&D
Recipe and ingredients: check. Time for R&D.
Validate your process by running small batches (ideally 500 to 1,000 grams). Use this time to test your flavor balance — how the acids, sweets, and your active all interact. Also, analyze the texture and gather second opinions on your product. Consider these questions: How long does the gummy take to set? How easy is it to pour? What amount of coating will ensure an ideal distribution? How’s the flavor? The buoyancy? Bite? Color? Are you hitting the right pH, Brix, and temperature? Be sure to dial in all of these variables.
COOKING
A good cook can navigate their kitchen with eyes closed. While you won’t need to (and probably shouldn’t) cook blind, a reliable precision cookpot is a central piece of gummy making kit.
Popular options include hot plates and kettles. There’s a wide variety of kettles available on the market, both unjacketed (cheaper!) and jacketed (more precise temperature control). Hot plates are similarly variable: some base their temperature targets off the actual slurry versus an input value.
DEPOSITING
Once your cook is complete, deposit your slurry into your molds.
Small start up? Consider hand-filling mold cavities individually using confectionary funnels. The upside of this method is the degree of control over per-cavity fill. The obvious downside is that it’s tedious. Make sure your slurry stays warm while hand-depositing so it doesn’t set.
A more efficient manual method is “flood and scrape.” In this process, tile out your molds end to end on a stainless steel table. Build a table perimeter wall to limit spill. Pour your slurry across the surface of your molds, and use a hi-temperature hand scraper to fill.
To achieve full systemization, call upon technology. “Depositors” combine the control of hand-filling with the volume of F&S. There are several industry-standard depositors used in the infused-candy space, including our own: The Dark City Phantom can produce about 8,000-12,000 pieces an hour. Reach out for more info on the Phantom.
SETTING
After depositing, allow your gummies to set.
Setting is the initial process of desiccation, in which water is drawn out of the gummy. Your set time will vary depending on shape and recipe. The ideal set time is the minimum to efficiently demold. Determining set time is another important aspect of R&D.
DEMOLDING
Once set, it’s time to demold, or release, the gummies from their cavities.
Demolding efficiency varies greatly. Recipe obviously plays a role. The quality of your molds is also a factor. Demolding should be as efficient as depositing. Otherwise, you’ll hit bottlenecks in production, eating away at your margins.
Perhaps you’ve seen “injection-style” molds during your research. This type of mold requires that the cavities are popped out one at a time. Inappropriate for producing at scale, these molds are almost synonymous with “demolding bottleneck.” Moreover, they can cause gummy deformation, from the force required. Perfect squares quickly become lumpen rectangles.
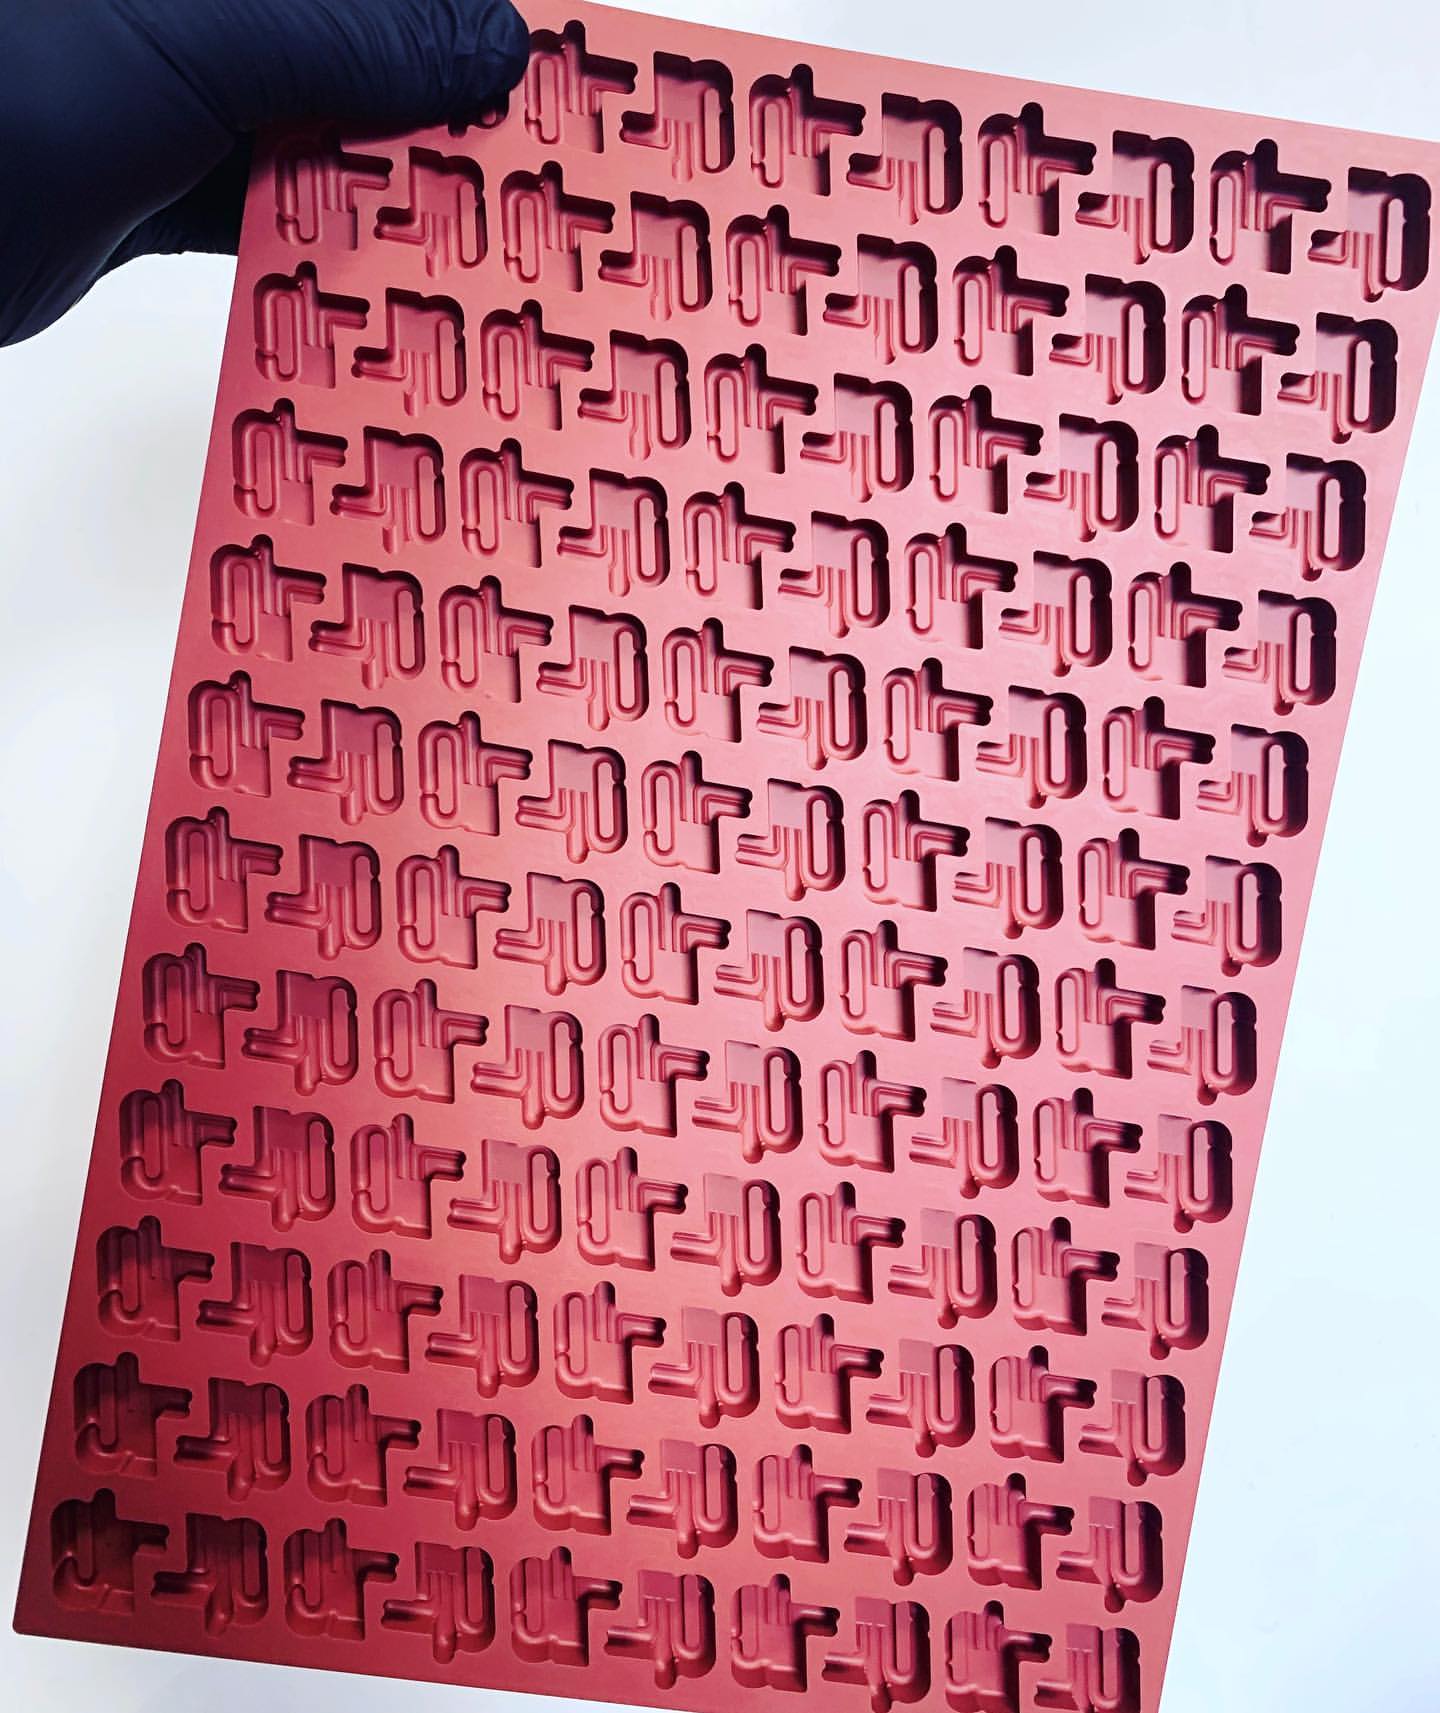
The molds you use are the most important pieces of your gummy making kit. You want to invest in flat-bottom "slab-style" platinum silicone molds for your operation for the significant efficiency they lend the demolding process. Substandard molds might work if you're only using 10 at a time. But when you scale up, you’ll want high quality mats you can rely on.
COATING
Coating gummies is a practical necessity. Coatings keep your gummies stable and prevent them from sticking to each other.
Sugar is popular and easy to apply. Throw your gummies in a bowl with sugar and sift. Starches (rice or tapioca) are finer than sugar, but applied in the same way. Starches give gummies a 'frosted' look, like mochi.
Polishes (waxes and oils) lend a translucent sheen to gummies popularly associated with making gummy bears. A polish is a subtler option that emphasizes your gummy’s geometry.
CURING
Curing allows the moisture level of your gummies to equilibrate before packaging.
Spread the coated gummies on a perforated baking sheet for uniform air exposure, and wait until they hit their target water activity level. The water molecules inside of your gummies must remain stable for the duration of their shelf life. Package at the wrong water activity level and you risk making your gummy vulnerable to yeast or bacteria. Note that our SOPs offer a robust framework for dialing in the water activity of your gummies.
PACKAGING
Popular packaging options abound for infused candies — notably mylar bags, bottles, and tins. Note that if you opt for a semi-automated packaging system, you may be locked into that type of packaging. Test your options during R&D – gummies can have varying interactions with packaging materials.
***
So, how are gummies made? The process starts long before the kettle is turned on. The intangible aspects of your operation — the recipe, R&D, and workflows — are just as integral as the tangible — your ingredients, molds, and equipment — to developing a high-quality, scalable gummy product your clients and customers will love.
Best of luck on your journey! We are here and ready for any questions you might have along the path.